Manage Class Group Guide
This guide covers how to manage an existing Class Group, including creating session templates, generating sessions for the term, editing settings, and deleting class groups.
Required Roles
| Action | Allowed Roles |
|---|---|
| View class group | All roles (including Trainers) |
| Edit settings, create templates, generate sessions | Super Admin, Master Licensee, Center Admin |
| Delete class group | Super Admin, Master Licensee only |
Note: Trainers have view-only access. They can view class group details and take attendance, but cannot make changes.
Accessing Class Group Detail
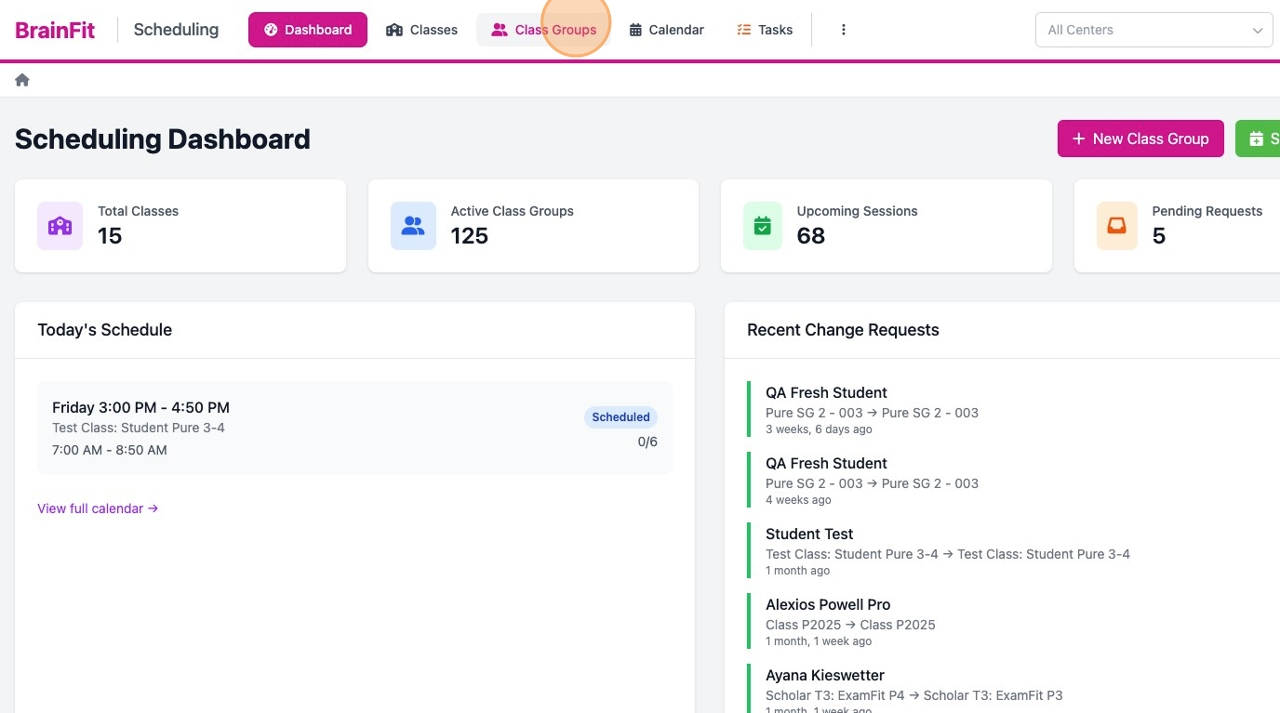
- Navigate to Class Groups from the sidebar
- Find your class group in the list
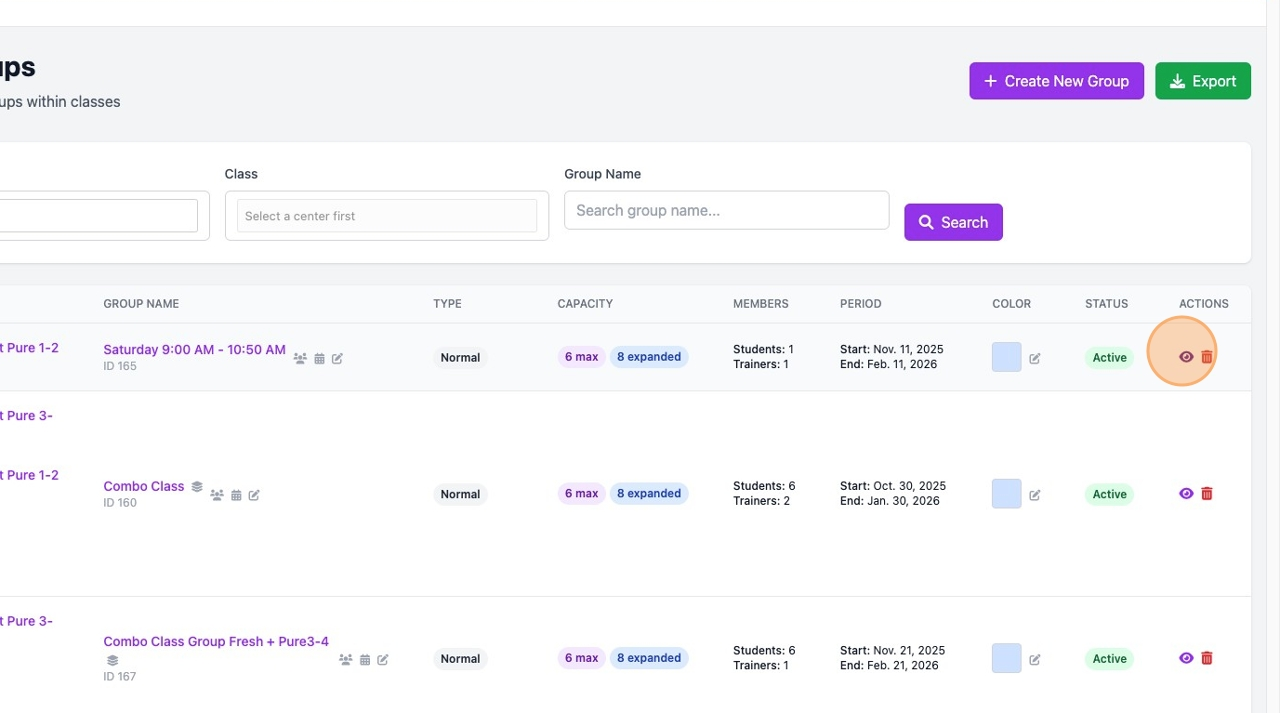
- Click the eye icon or the group name to open the detail view
Class Group Detail Overview
The Class Group Detail page has several sections:
| Section | Description |
|---|---|
| Header | Group name, associated classes, publish status |
| Info Cards | Capacity, teachers count, upcoming sessions, templates count |
| Session Templates | Recurring session patterns |
| Sessions | List of upcoming and recent sessions |
| Group Details | Editable settings (right sidebar) |
| Assigned Teachers | Teachers assigned to this group |
| Students | Students assigned to this group |
| Quick Actions | Generate sessions, sync students |
Editing Class Group Settings
Click the pencil icon next to any editable field to modify it:
Editable Fields
| Field | Description | How to Edit |
|---|---|---|
| Group Name | Name displayed in lists and calendars | Click pencil icon next to name |
| Group Type | Normal or Premium | Click pencil in Group Details |
| Color | Calendar display color | Click pencil, select from palette |
| Term Period | Start and end dates | Click pencil, select new dates |
| Description | Optional notes | Click pencil, enter text |
| Capacity | Max participants / Expanded capacity | Click pencil (updates all templates and sessions) |
| Location | Default room/location | Click pencil, enter location |
Changing Capacity (Important!)
When you change capacity settings:
- The change cascades to ALL session templates
- The change cascades to ALL existing sessions
- This ensures consistency across the entire group
Session Templates
Session templates define your recurring weekly schedule. Each template specifies:
- Day of the week (Monday - Sunday)
- Start and end time
- Capacity settings
Creating a Session Template
- Click Add Template button (top right or in templates section)
- Fill in the template form:
- Name: Descriptive name (e.g., "Saturday Morning 9AM")
- Day of Week: Select the day
- Start Time: Session start time
- End Time: Session end time
- Location: Optional room/location
- Click Create Template
Editing a Session Template
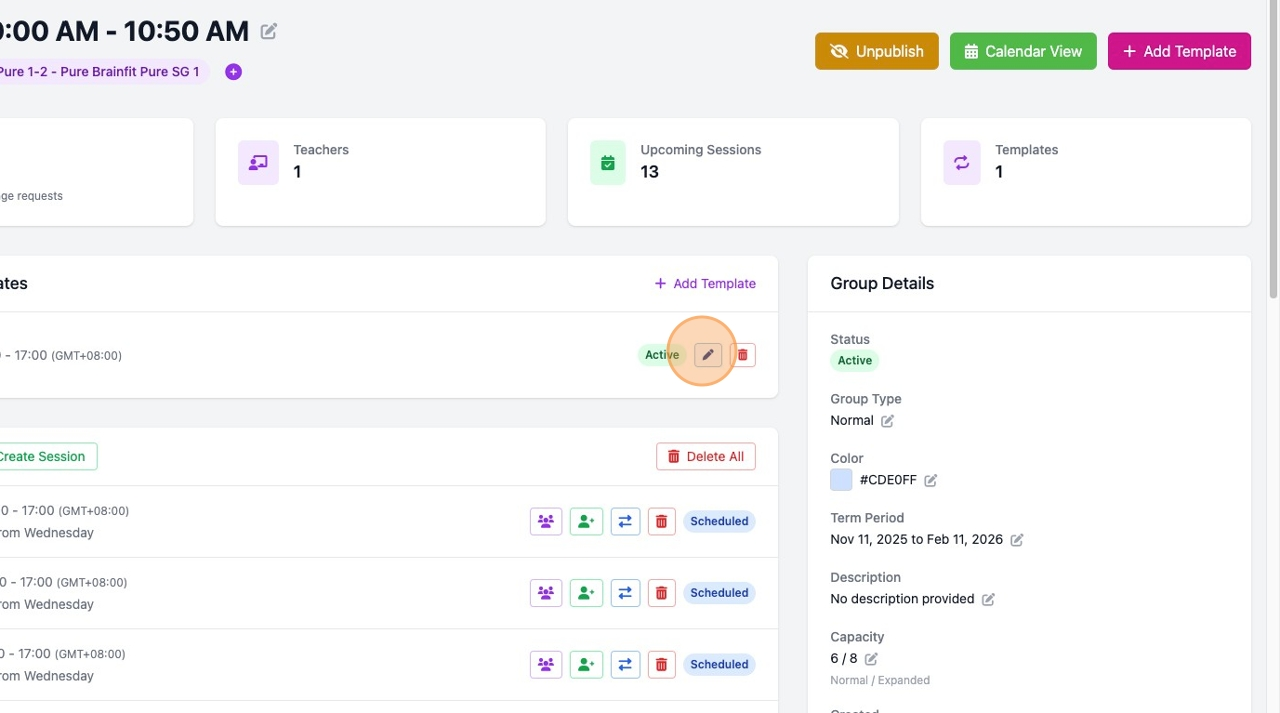
- Find the template in the Session Templates section
- Click the pencil icon
- Modify the fields:
- Name
- Day of week
- Start time
- End time
- Click Save
Important: Editing a template's schedule (day/time) will automatically update ALL sessions that were generated from this template!
Deleting a Session Template
- Click the trash icon next to the template
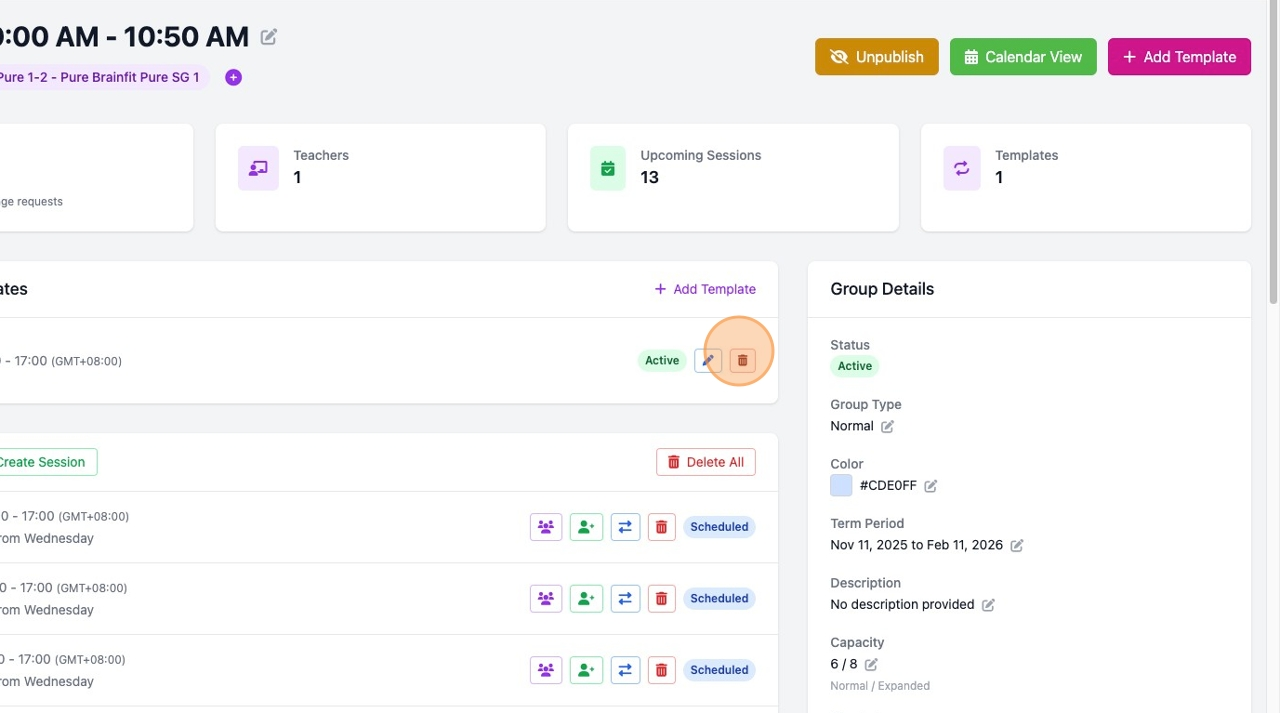
- Confirm the deletion
Warning: Deleting a template will also delete ALL sessions generated from it!
Generating Sessions
After creating templates, you need to generate actual session instances for your term.
Step-by-Step: Generate Sessions
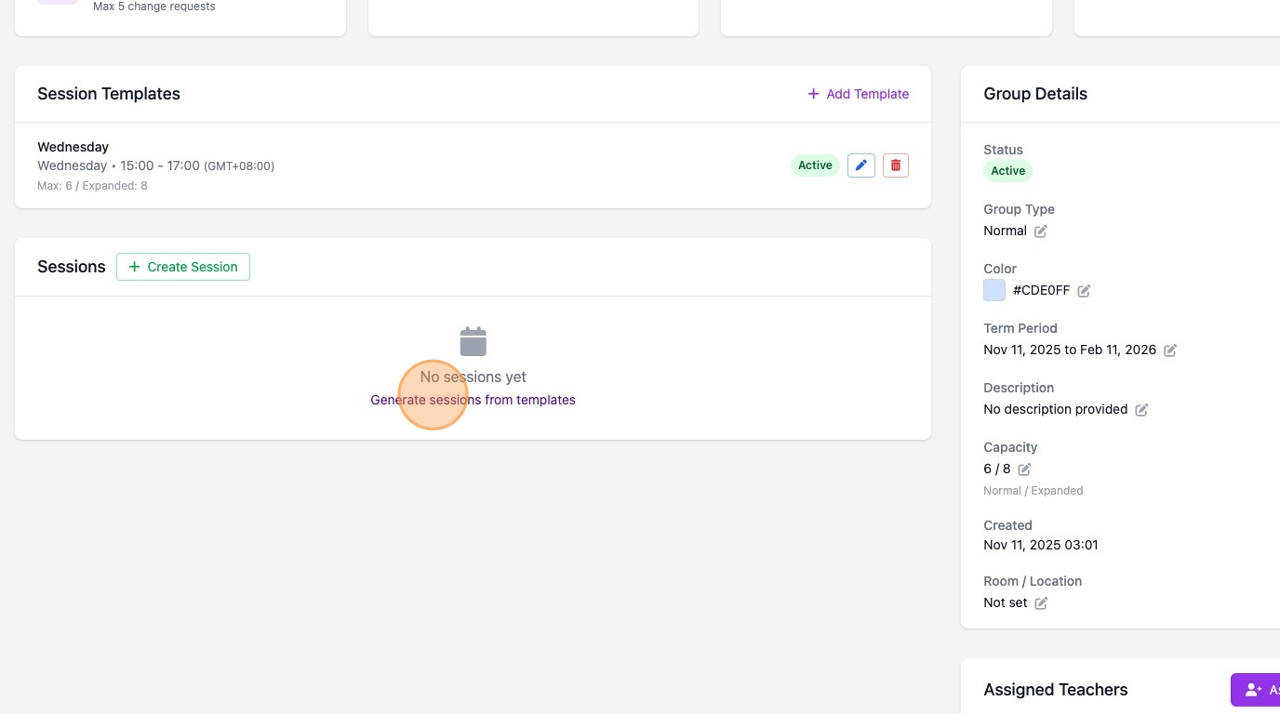
- Click Generate Sessions in Quick Actions (or the link in empty sessions area)
-
In the modal, configure:
Option Description Start Date When to begin generating sessions End Date When to stop generating sessions Select Templates Check which templates to use Skip existing Don't create duplicates for dates with sessions Auto-assign students Automatically add all group students to sessions -
Click Generate Sessions
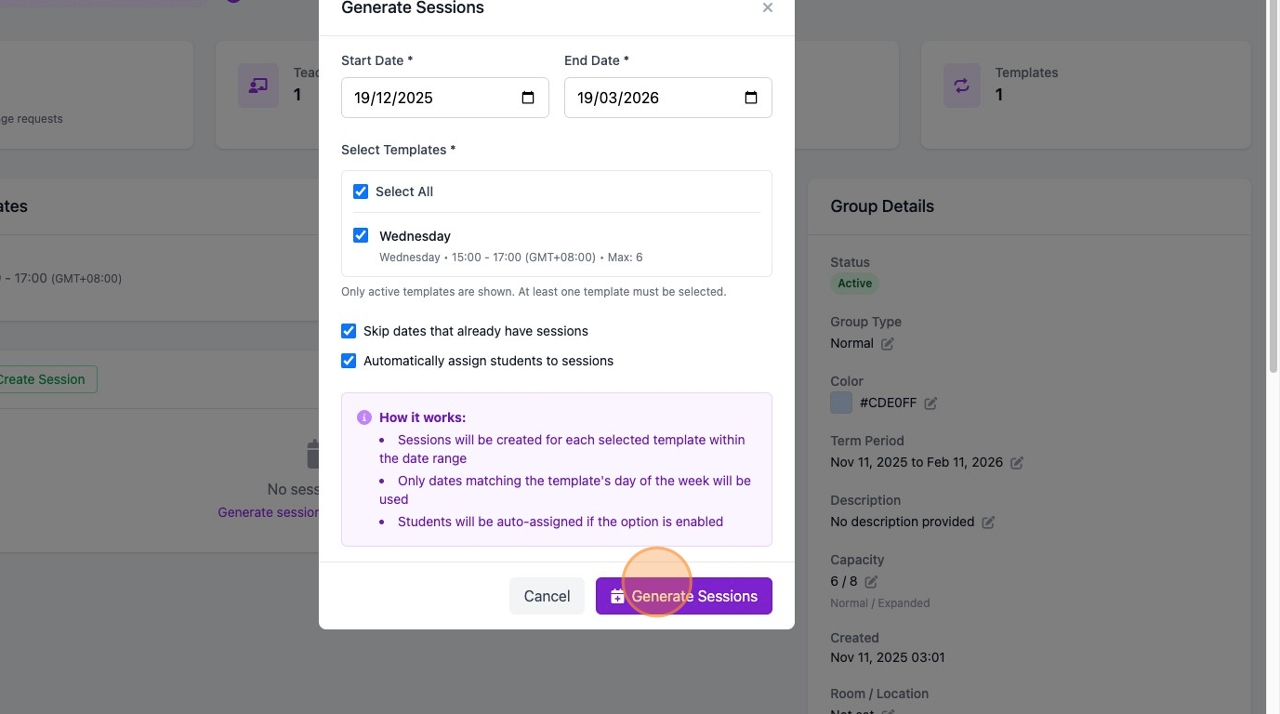
Generation Options Explained
- Skip dates that already have sessions: Recommended to avoid duplicates
- Automatically assign students to sessions: When enabled, all students in the group will be assigned to every generated session
Best Practices
- Generate for full term: Set dates from term start to term end
- Select all active templates: Unless you want to generate only specific days
- Keep "Skip existing" checked: Prevents duplicate sessions
- Enable auto-assign: Saves time enrolling students manually
Managing Sessions
Creating a Manual Session
For one-off sessions outside the template schedule:
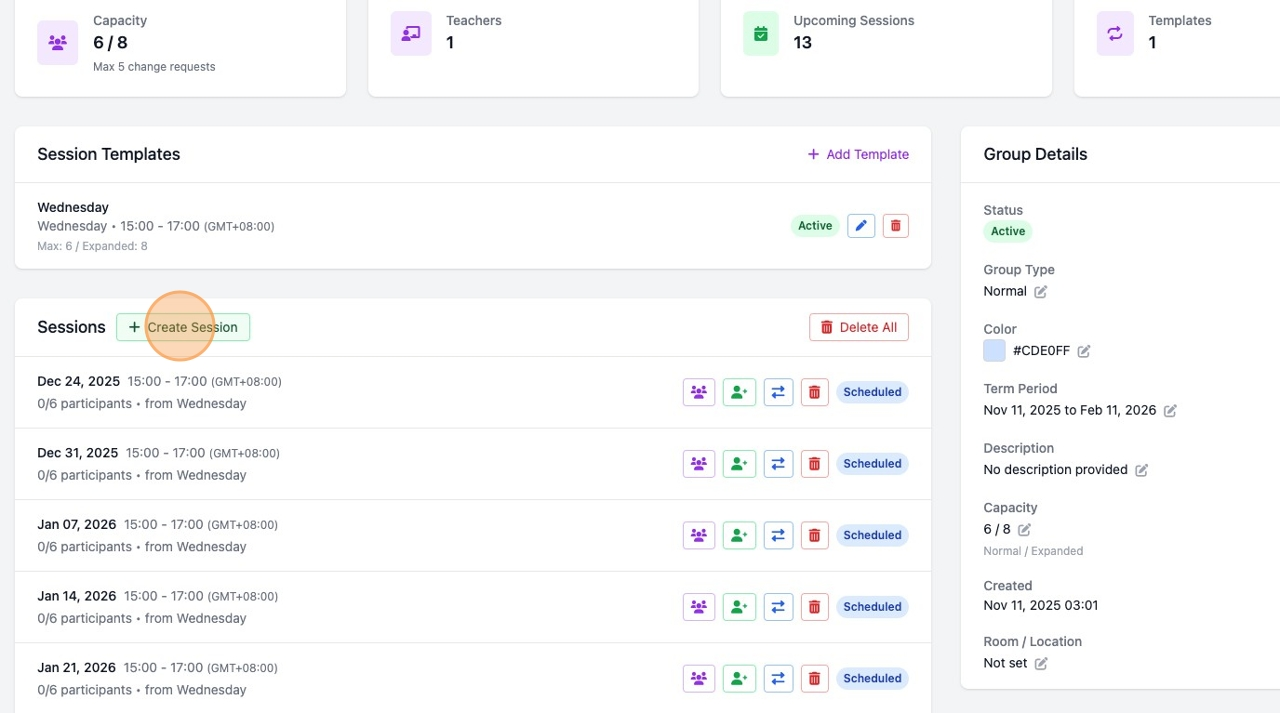
- Click Create Session button in the Sessions section
-
Fill in:
- Date and start time
- Duration (in minutes)
- Max participants
- Session title (optional)
- Select students to assign
-
Click Create Session
Session Actions
Each session in the list has action buttons:
| Icon | Action | Description |
|---|---|---|
| 👥 (users) | Attendance | Open attendance management |
| ➕ (user-plus) | Add/Remove Students | Manage session enrollment |
| 🔄 (exchange) | Change Request | Create a session change request |
| 🗑️ (trash) | Delete | Delete this session |
Deleting All Sessions
- Click Delete All button in Sessions header
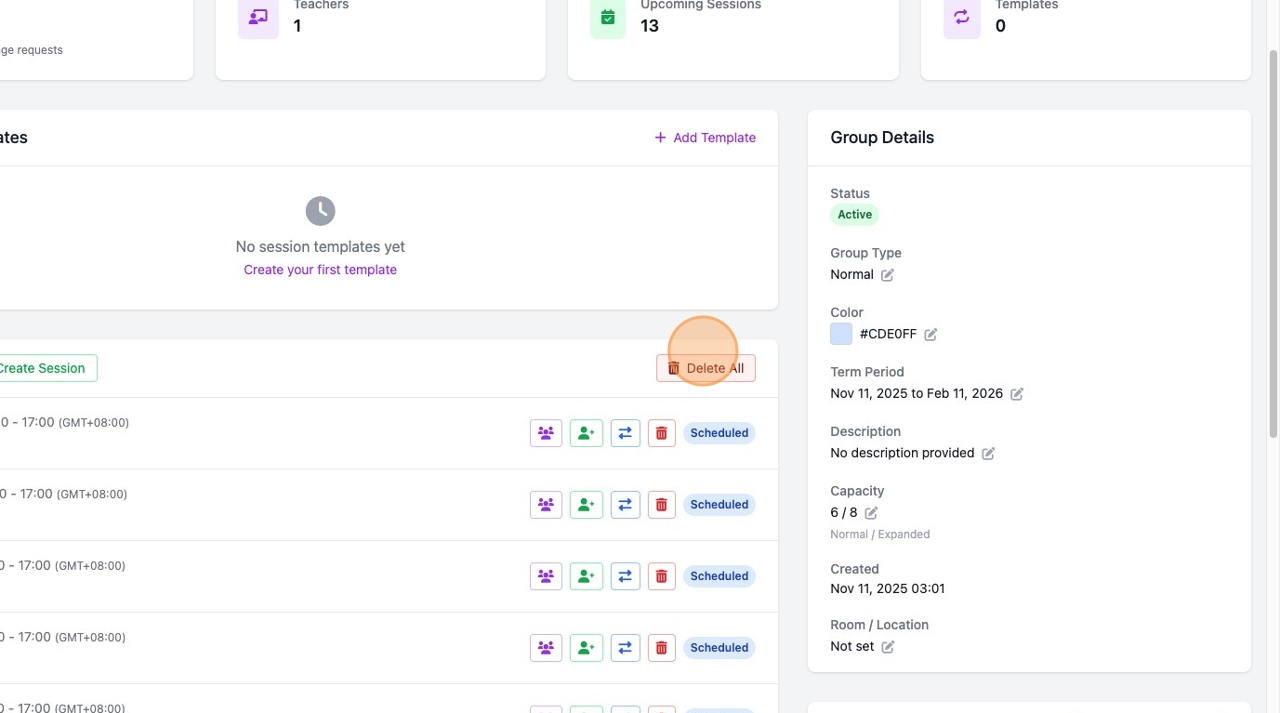
- Confirm the action
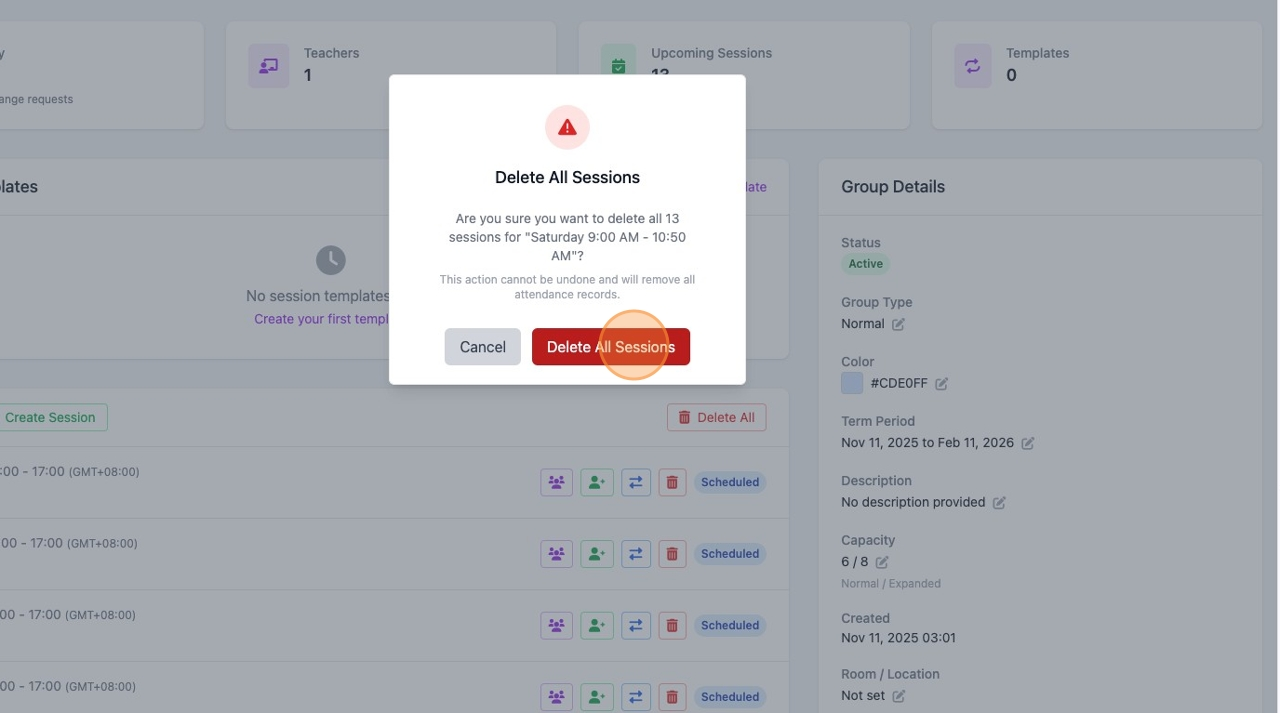
Warning: This permanently deletes ALL sessions and their attendance records!
Managing Members
Assigning Teachers
- Click Assign Teachers button
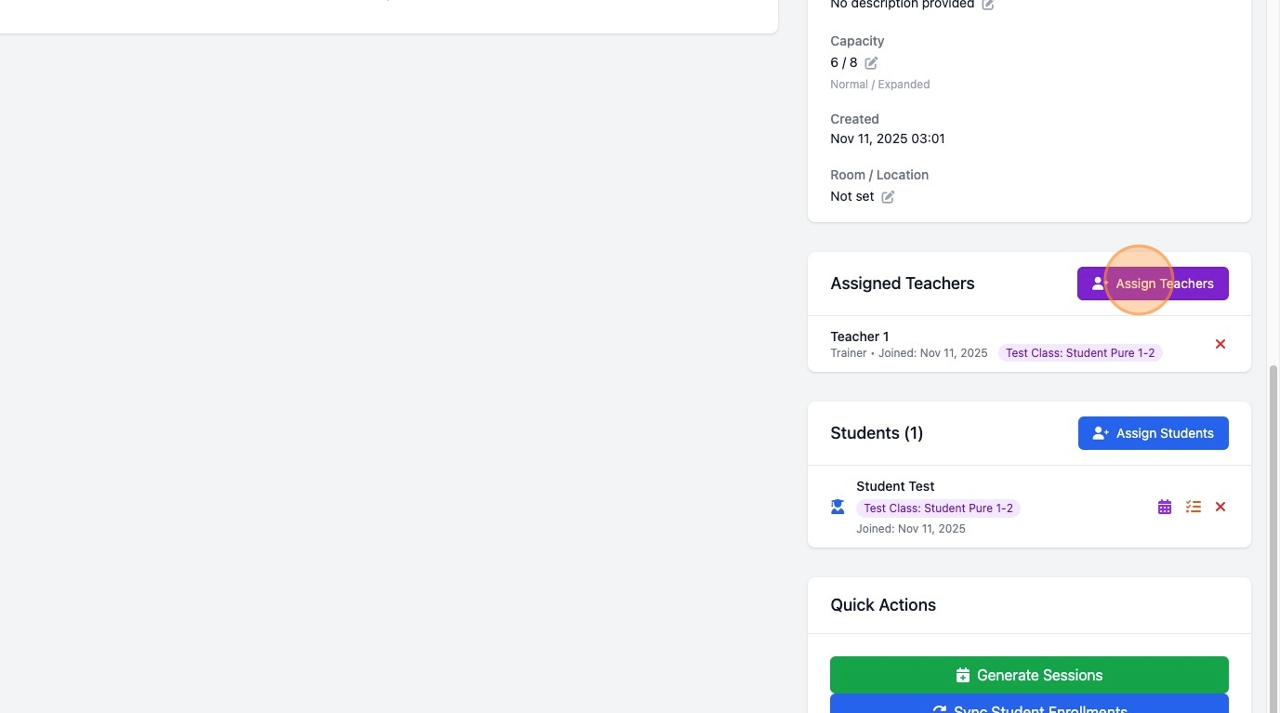
- Check the teachers you want to add
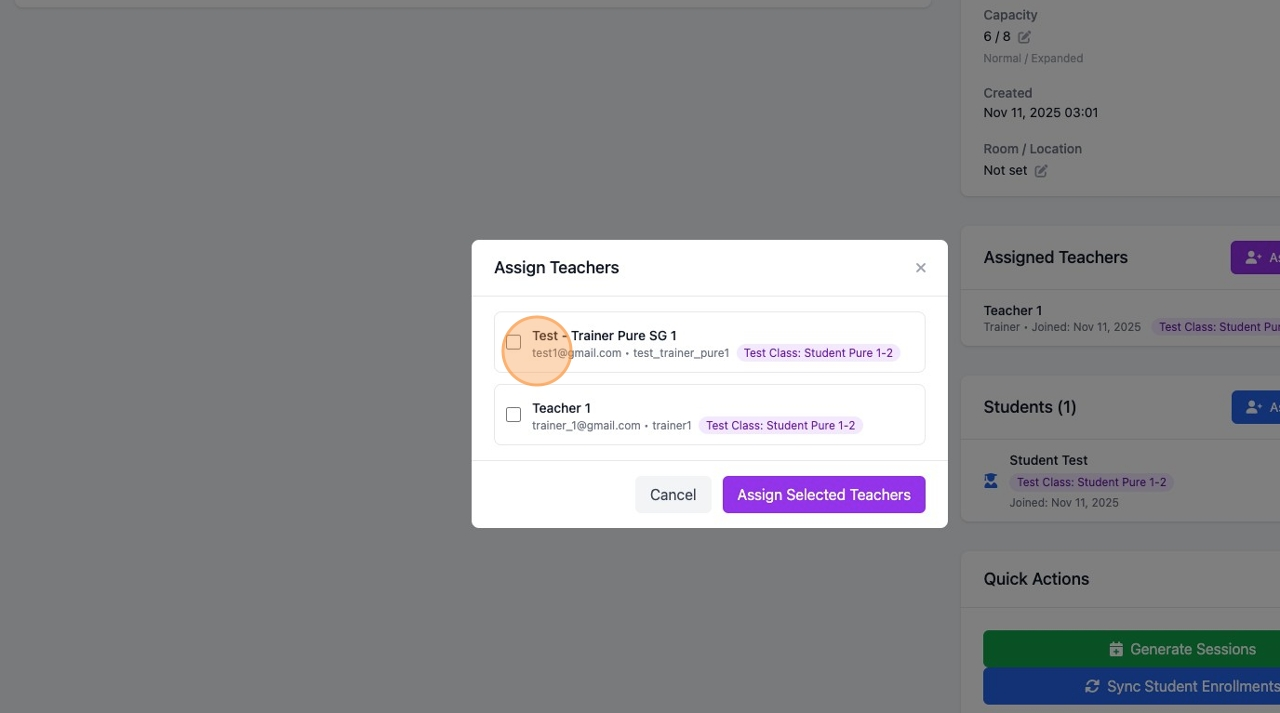
- Click Assign Selected Teachers
Removing Teachers
- Find the teacher in the Assigned Teachers list
- Click the X button
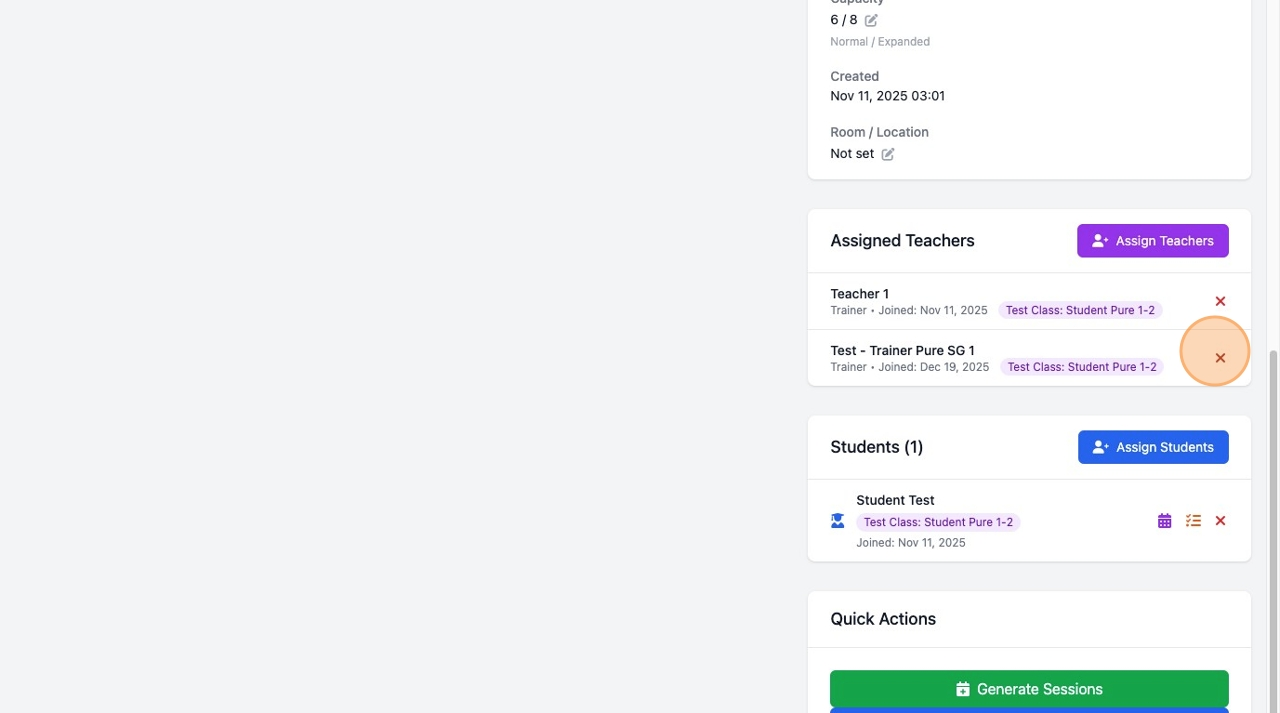
- Confirm removal
Assigning Students
- Click Assign Students button
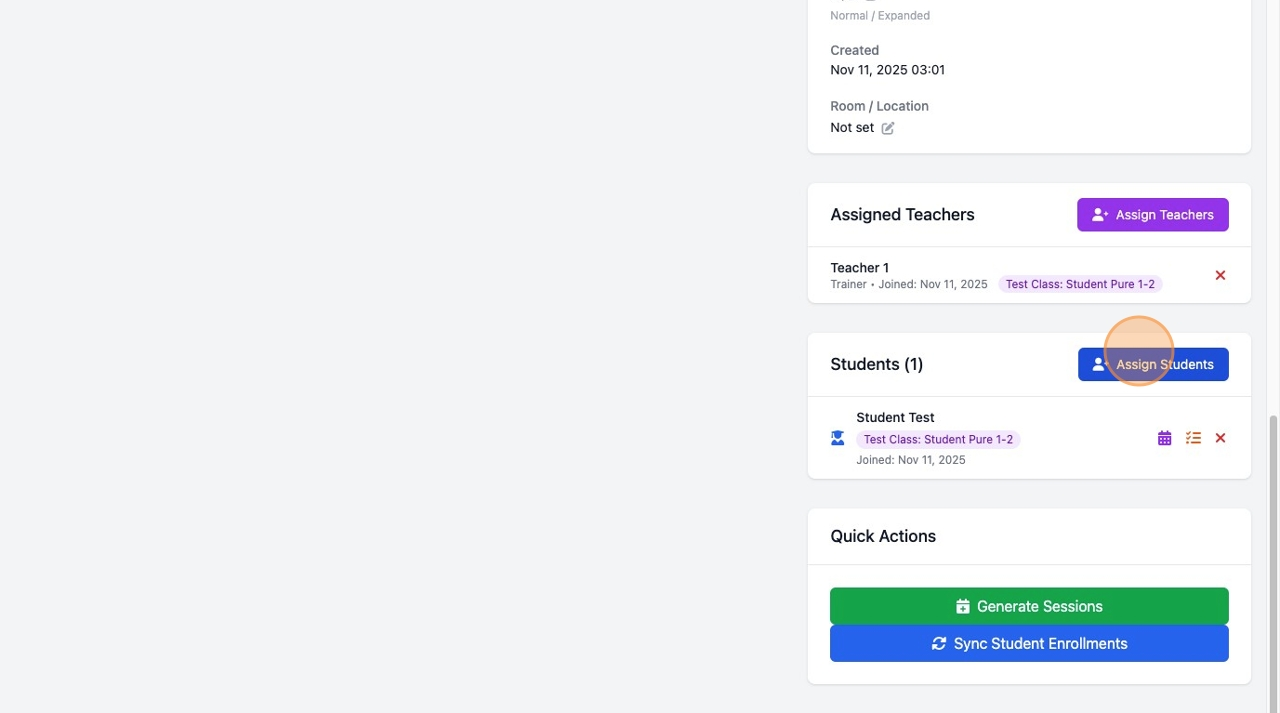
- Check the students you want to add (shows students from associated classes)
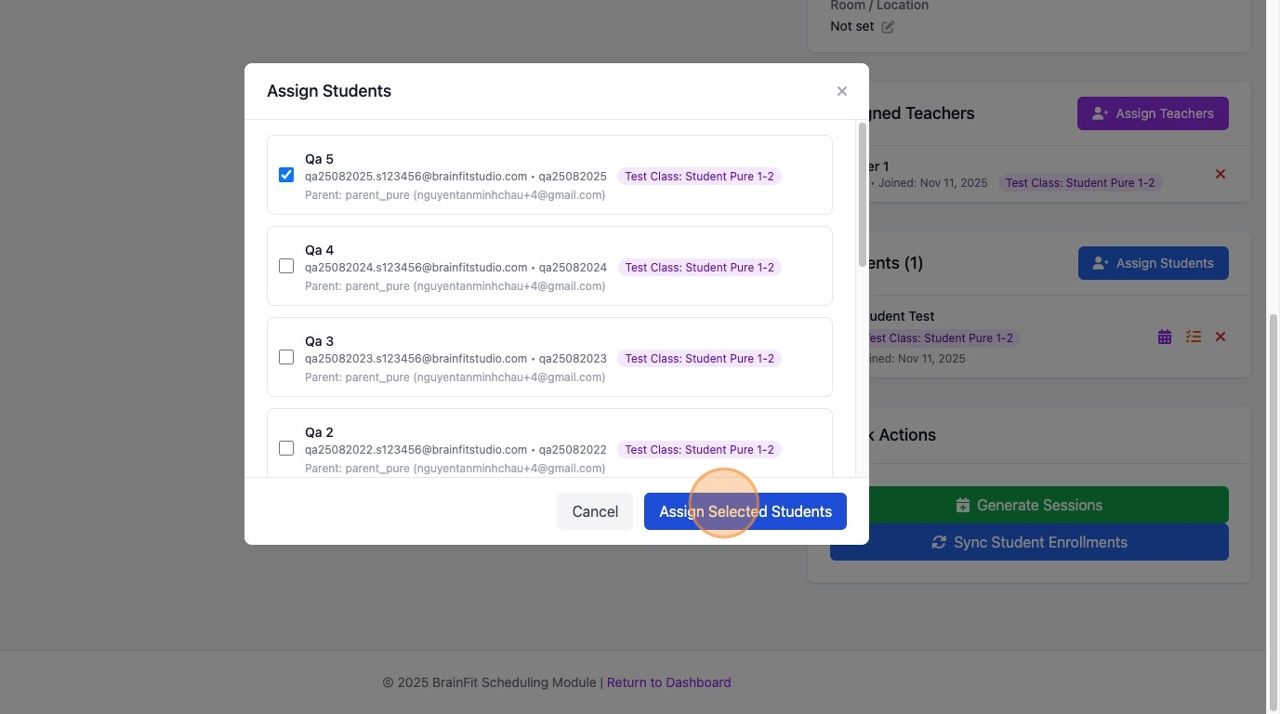
- Click Assign Selected Students
Removing Students
- Find the student in the Students list
- Click the X button
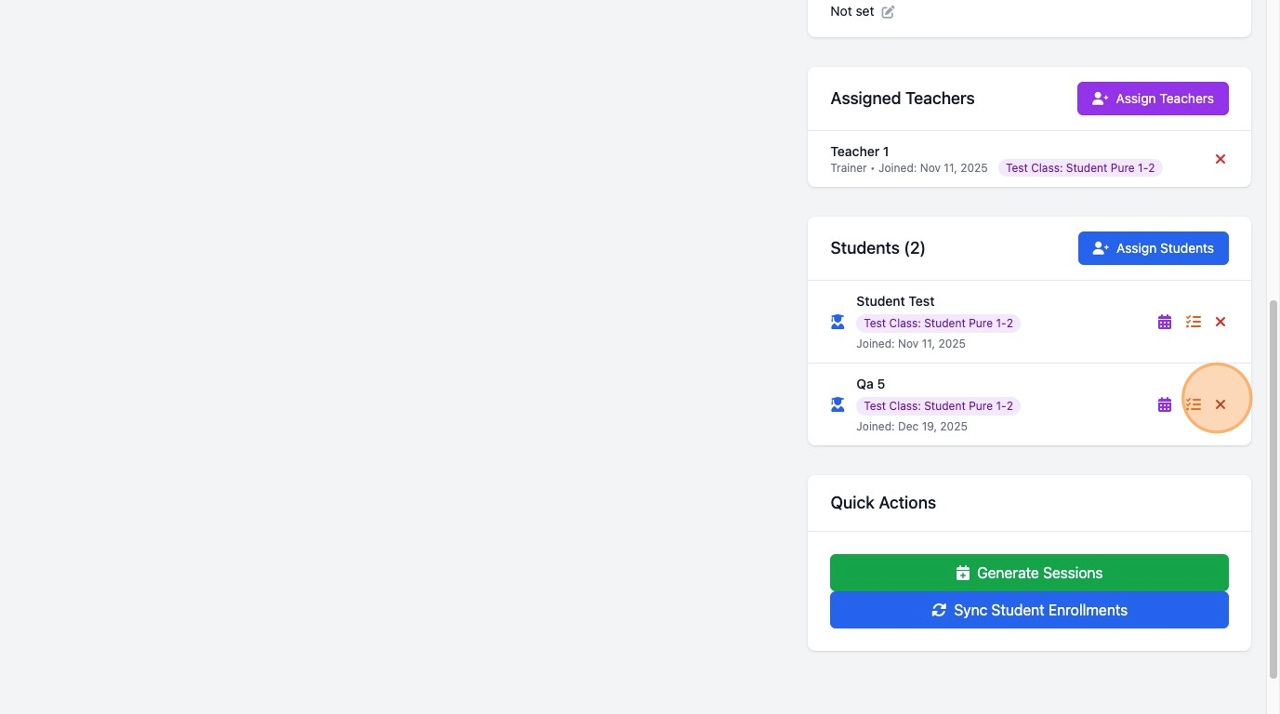
- Confirm removal
Quick Actions
Sync Student Enrollments
If you added new students to the group and want them enrolled in existing future sessions:
- Click Sync Student Enrollments in Quick Actions
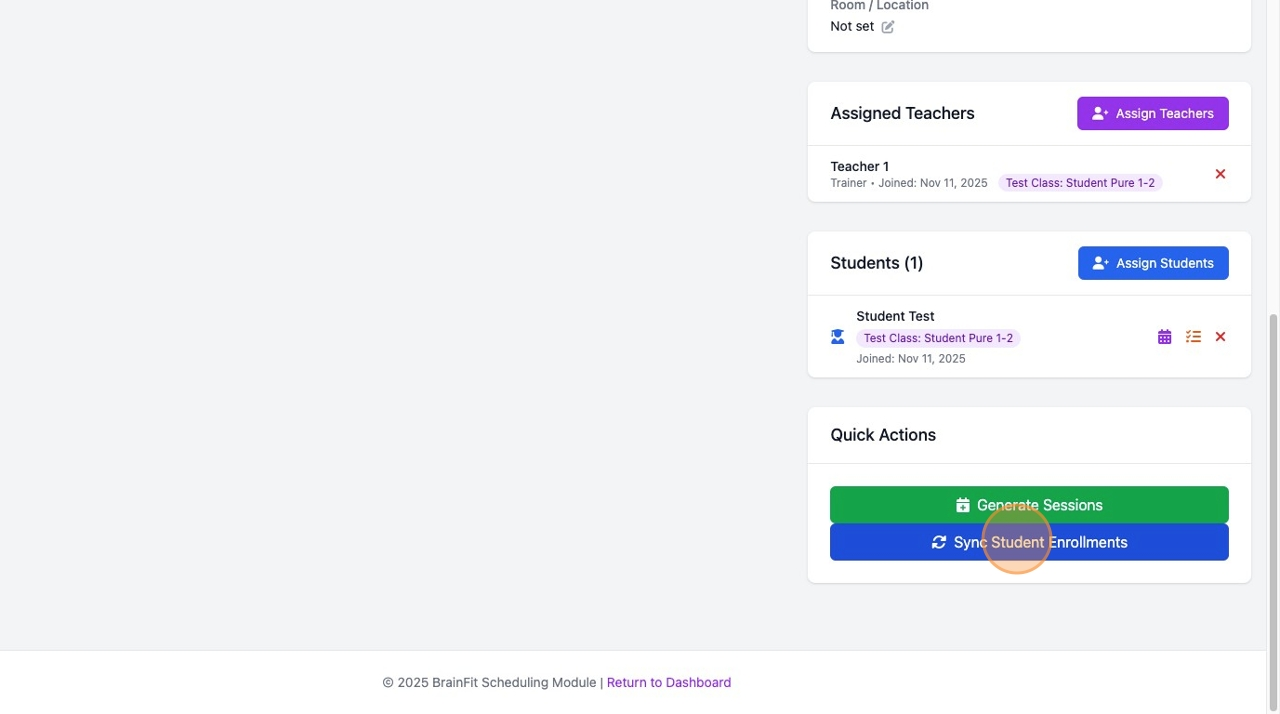
- Confirm the action
- All group students will be added to all future sessions
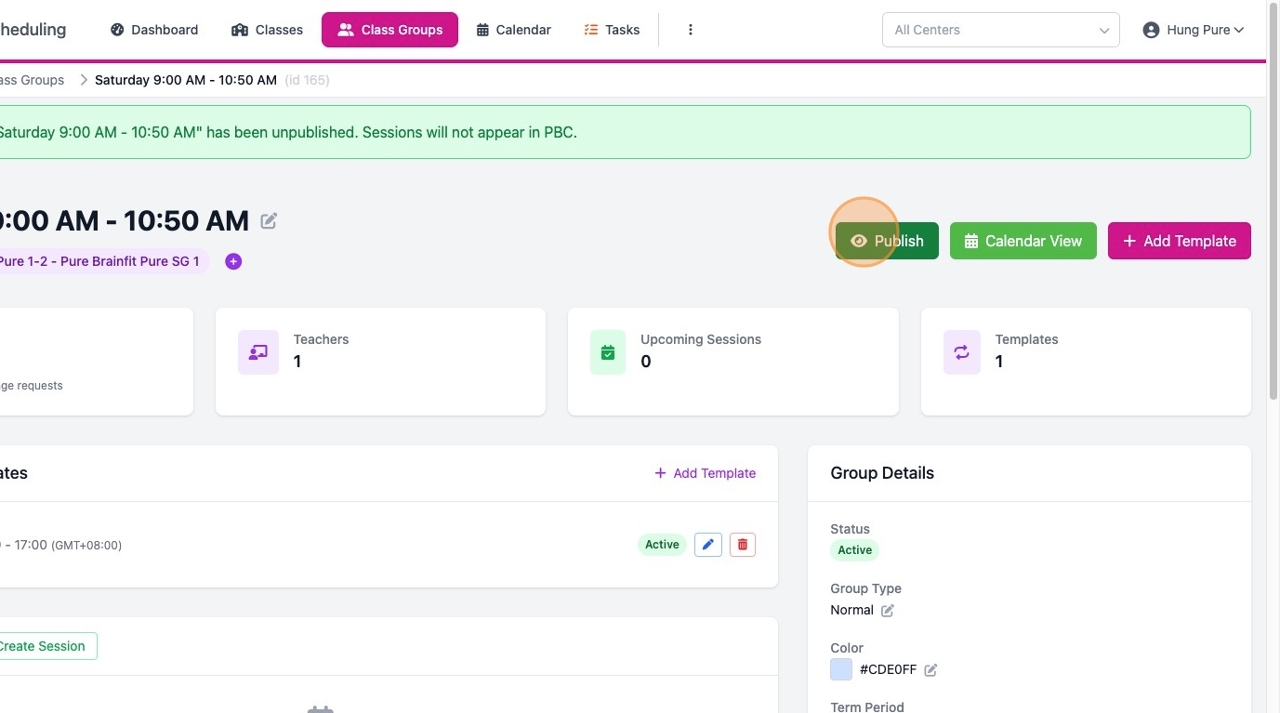
Publishing / Unpublishing
Control whether sessions are visible to parents in the Parent Booking Center (PBC):
| Status | Button | Effect |
|---|---|---|
| Published | Yellow Unpublish | Sessions visible in PBC |
| Unpublished | Green Publish | Sessions hidden from PBC |
Use unpublish while setting up a new term, then publish when ready.
Deleting a Class Group
⚠️ CRITICAL WARNING ⚠️
Deleting a class group is a permanent, destructive action that:
- Deletes the class group record
- Deletes ALL session templates
- Deletes ALL sessions
- Deletes ALL attendance records
- Deletes ALL membership records
This action CANNOT be undone!
Who Can Delete
Only Super Admin and Master Licensee roles can delete class groups.
How to Delete
- Go to Class Groups list
- Find the group you want to delete
- Click the trash icon in the Actions column
- Read the warning carefully
- Confirm deletion
Before Deleting
Consider these alternatives:
- Unpublish the group instead (hides from PBC but preserves data)
- Export data if you need records for reporting
- Change status to Inactive to keep history
Calendar View
For a visual overview of all sessions:
- Click Calendar View button (green button at top)
- View sessions in month/week/day format
- Click any session to see details or take attendance
Common Tasks Quick Reference
| Task | Where to Find |
|---|---|
| Edit group name | Click pencil icon next to name in header |
| Change capacity | Group Details > Capacity > pencil icon |
| Add session template | Add Template button or Session Templates section |
| Generate term sessions | Quick Actions > Generate Sessions |
| Add students to group | Students section > Assign Students |
| Add students to sessions | Sync Student Enrollments or individual session |
| View calendar | Calendar View button (top right) |
| Delete group | Class Groups list > trash icon |
Troubleshooting
| Issue | Solution |
|---|---|
| Can't see edit buttons | You may have Trainer role (view-only) |
| Sessions not appearing | Check term dates and template day of week |
| Students not in sessions | Use "Sync Student Enrollments" |
| Can't delete group | Only Super Admin and Master Licensee can delete |
| Sessions showing in PBC before ready | Unpublish the group until ready |
Last Updated: December 2025