Managing Students in Class Groups
This guide explains how to add and remove students from a class group, and how to sync student enrollments to sessions after making changes.
Required Roles
| Action | Allowed Roles |
|---|---|
| View students | All roles (including Trainers) |
| Add/remove students from group | Super Admin, Master Licensee, Center Admin |
| Sync student enrollments | Super Admin, Master Licensee, Center Admin |
Note: Trainers have view-only access and cannot modify group membership.
Understanding the Two Levels
There are two levels of student assignment in BrainFit Scheduling:
| Level | Description | Effect |
|---|---|---|
| Group Membership | Student is a member of the class group | Student appears in the group's student list |
| Session Enrollment | Student is assigned to specific sessions | Student appears in session attendance |
Important: Adding a student to a group does NOT automatically add them to existing sessions. You need to either:
- Use Sync Student Enrollments to add them to all future sessions, OR
- Manually add them to specific sessions
Adding Students to a Class Group
Step-by-Step
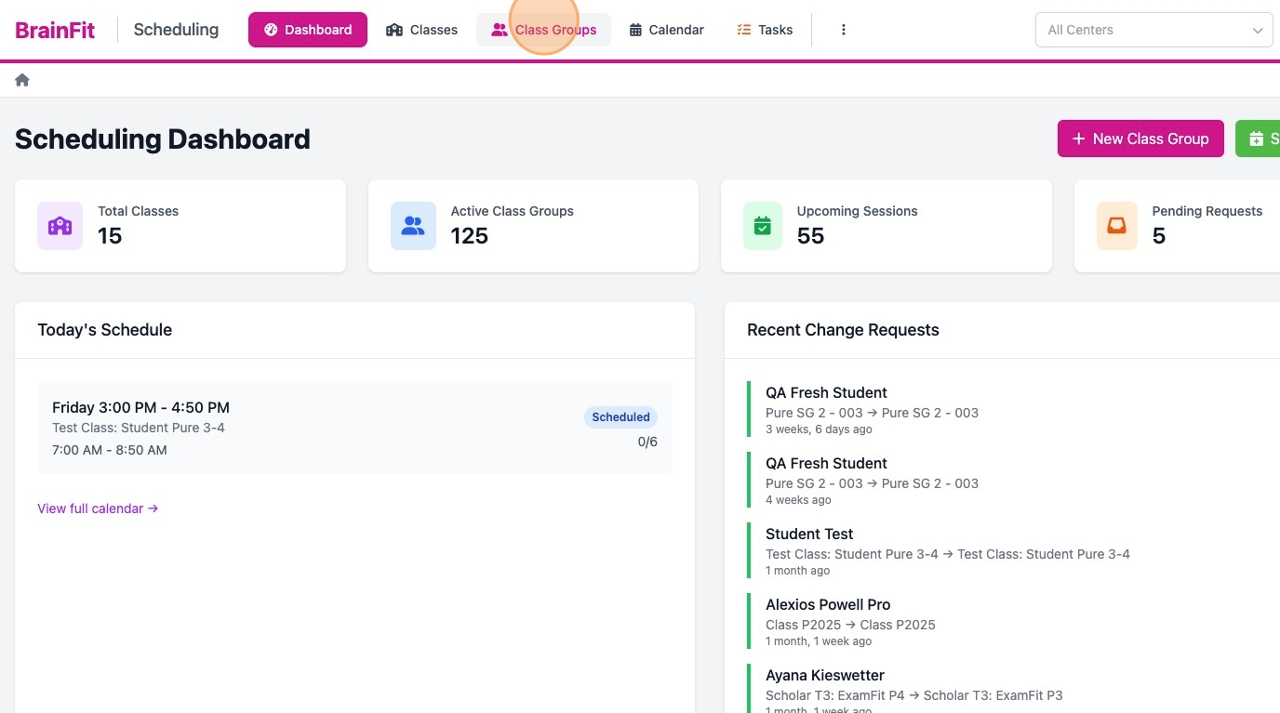
- Navigate to the Class Group Detail page
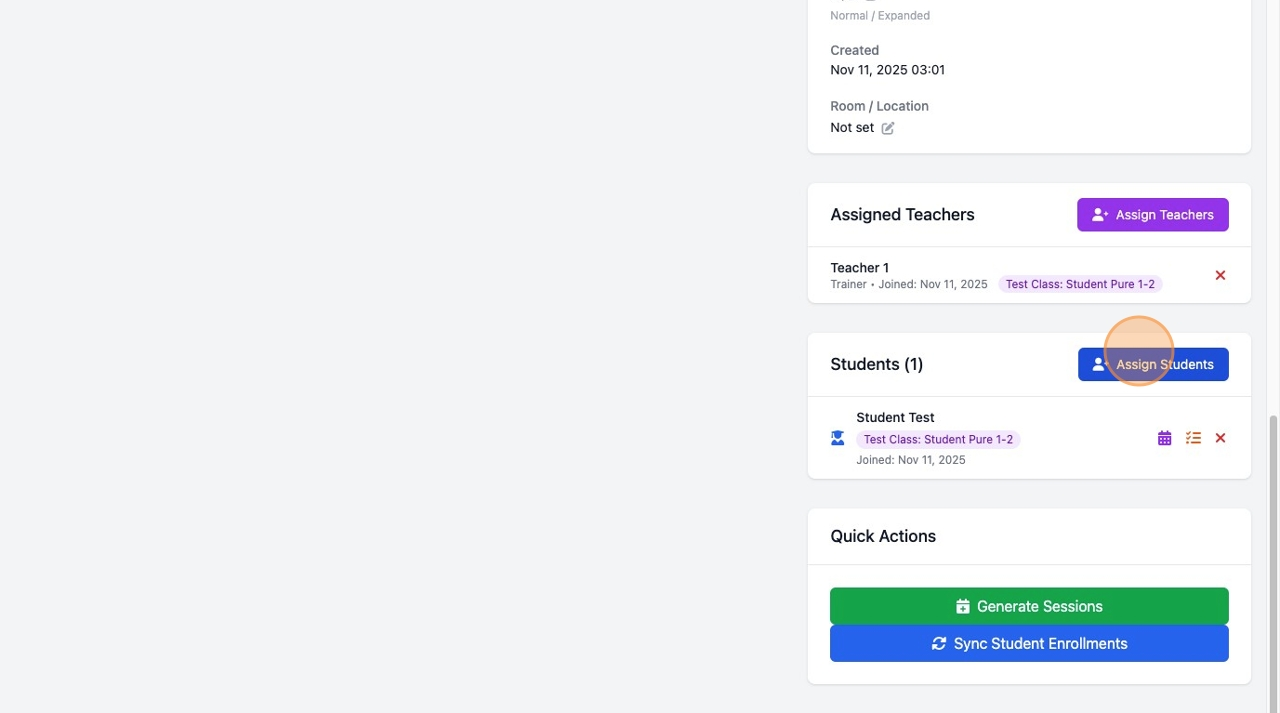
- Find the Students section in the right sidebar
- Click the Assign Students button (blue button)
In the Assign Students Modal
- You'll see a list of available students from the associated class(es)
-
Each student shows:
- Name
- Email and username
- Parent information (if available)
- Source class (shown as a purple badge)
-
Check the box next to each student you want to add
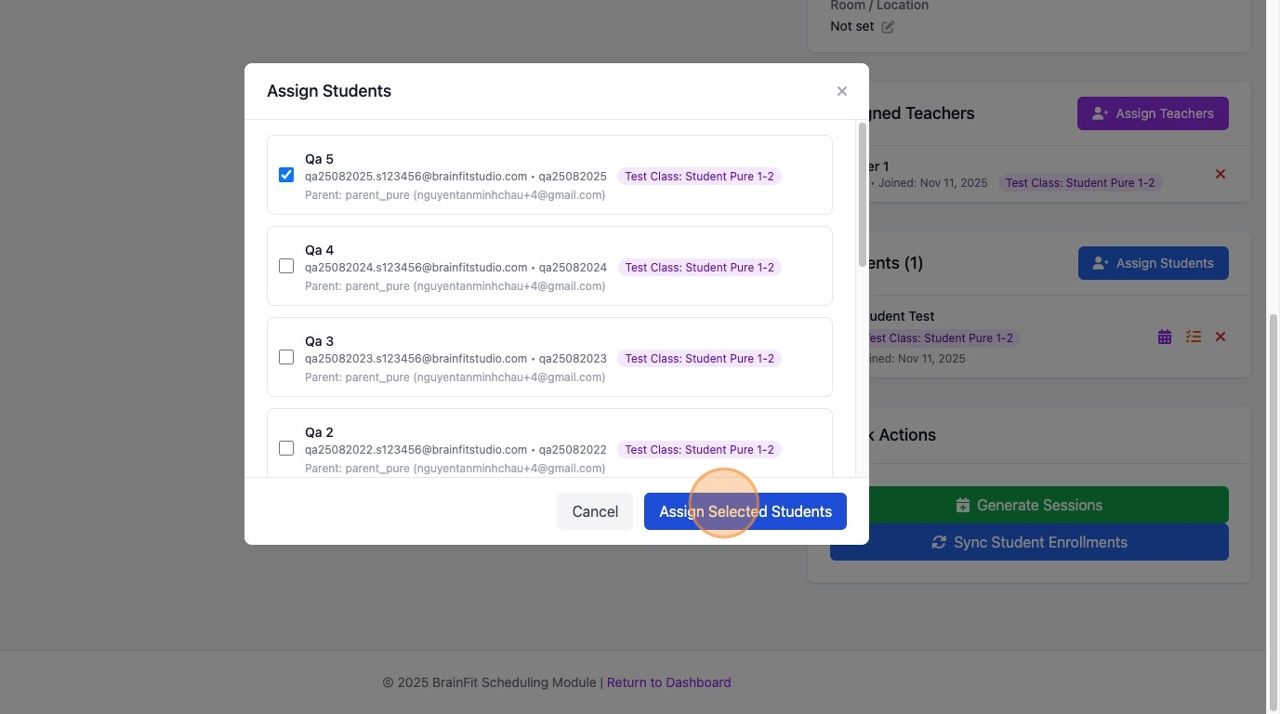
- Click Assign Selected Students
After Adding Students
The students are now group members but are NOT yet in any sessions. To add them to sessions:
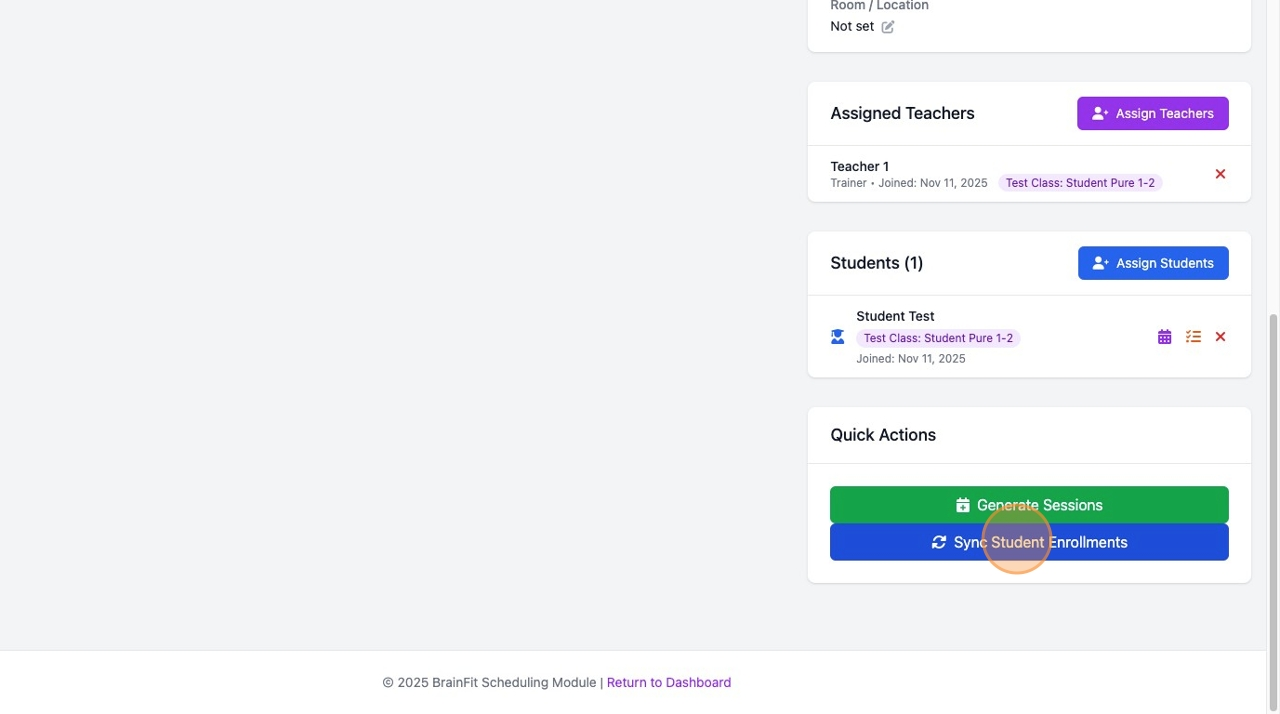
Option A: Sync to all future sessions
- Use the Sync Student Enrollments button (see below)
Option B: Add to specific sessions only
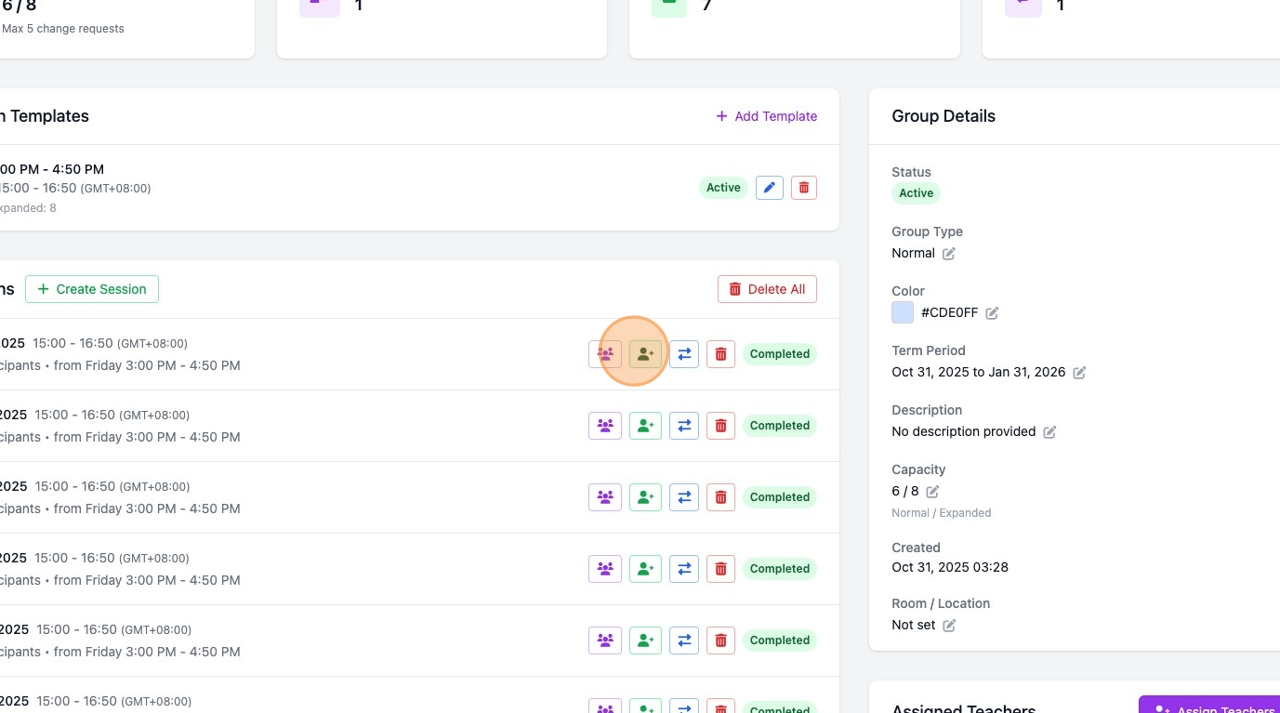
- Go to each session and use "Add/Remove Students" feature
Removing Students from a Class Group
Step-by-Step
- Navigate to the Class Group Detail page
- Find the student in the Students section
- Click the X button (red) next to the student's name
- Confirm the removal when prompted
What Happens When You Remove a Student
- Student is removed from the group membership
- Student remains in any existing session enrollments (attendance records)
- To fully remove from sessions, you need to manually remove from each session
Important Considerations
- Removing a student does NOT delete their attendance history
- If the student has session change requests, those remain in the system
- Consider the timing - removing mid-term affects reporting
Syncing Student Enrollments to Sessions
The Sync Student Enrollments feature adds ALL current group members to ALL future sessions.
When to Use Sync
| Scenario | Use Sync? |
|---|---|
| Added new students, want them in all future sessions | Yes |
| Generated new sessions, students not enrolled | Yes |
| Want to ensure consistency across all sessions | Yes |
| Only want specific students in specific sessions | No (use manual method) |
Step-by-Step
- Navigate to the Class Group Detail page
- Find the Quick Actions section (bottom of right sidebar)
- Click Sync Student Enrollments (blue button)
- Confirm when prompted: "This will enroll all assigned students in existing future sessions. Continue?"
- Wait for the sync to complete
What Sync Does
For each FUTURE session in the group:
  For each STUDENT in the group:
    If student NOT already in session:
      Add student to session with status "Assigned"
What Sync Does NOT Do
- Does NOT remove students from sessions
- Does NOT affect past sessions (completed sessions)
- Does NOT change existing attendance statuses
- Does NOT add students who are not group members
Managing Students in Individual Sessions
For more granular control, you can add/remove students from specific sessions.
Accessing Session Student Management
- In the Sessions section, find the session
- Click the Add/Remove Students icon (➕ green user-plus icon)
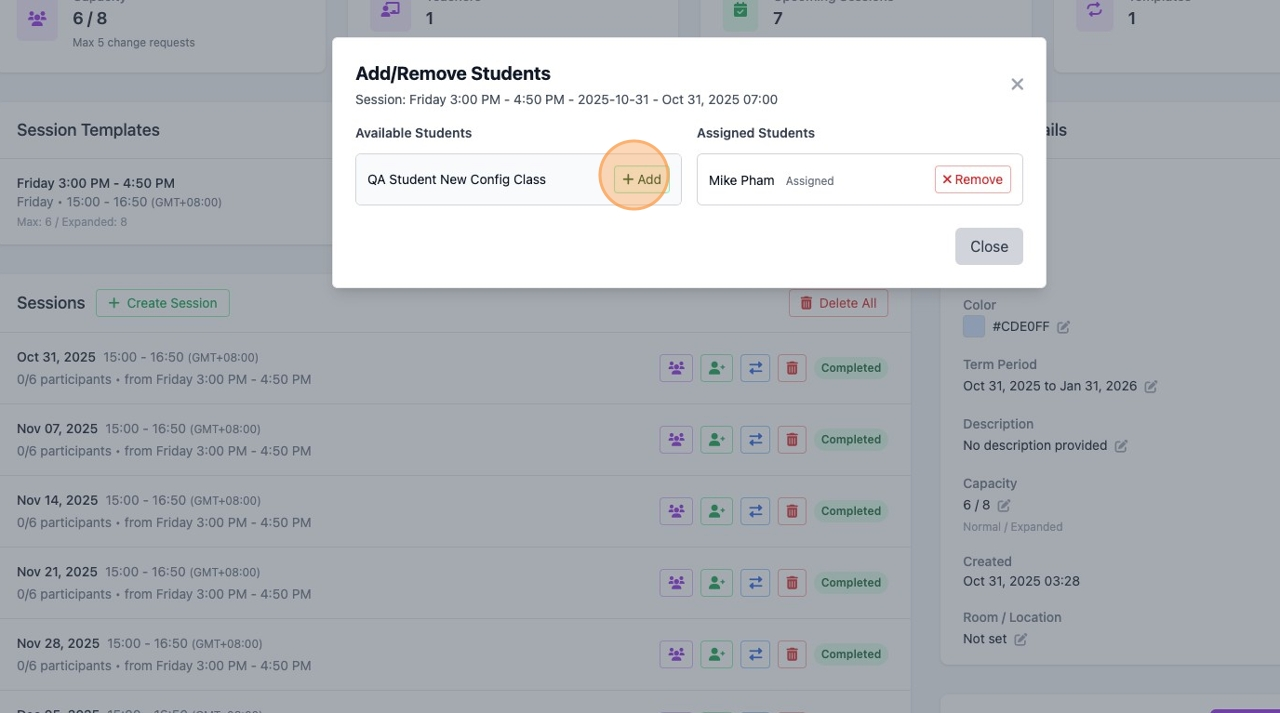
The Add/Remove Students Modal
The modal shows two columns:
| Left Column | Right Column |
|---|---|
| Available Students | Assigned Students |
| Group members NOT in this session | Students currently in this session |
| Click "Add" to assign | Click "Remove" to unassign |
Adding a Student to a Session
- Open the Add/Remove Students modal
- Find the student in the Available Students column (left)
- Click the Add button next to their name
- Student moves to Assigned Students column
Removing a Student from a Session
- Open the Add/Remove Students modal
- Find the student in the Assigned Students column (right)
- Click the Remove button next to their name
- Confirm removal
- Student moves back to Available Students column
Note: Removing a student from a session does NOT remove them from the group.
Common Workflows
Workflow 1: New Student Joins Mid-Term
- Add to group: Assign Students > Select student > Assign
- Sync to sessions: Quick Actions > Sync Student Enrollments
- Result: Student is in all future sessions
Workflow 2: Student Joins for Specific Sessions Only
- Add to group: Assign Students > Select student > Assign
- Add to specific sessions:
- Go to each desired session
- Click Add/Remove Students
- Add the student
- Result: Student is only in selected sessions
Workflow 3: Student Leaves the Group
- Remove from group: Click X next to student name > Confirm
- Optionally remove from sessions:
- If you want to keep attendance history: Do nothing
- If you want to remove from future sessions: Remove from each session manually
Workflow 4: New Sessions Generated, Students Missing
- Check: Verify students are group members (in Students list)
- Sync: Quick Actions > Sync Student Enrollments
- Result: All group members added to new sessions
Workflow 5: Transfer Student Between Groups
- In old group: Remove student from group membership
- In new group: Add student via Assign Students
- In new group: Sync Student Enrollments (or add to specific sessions)
Viewing Student Information
Student Actions Available
In the Students section, each student has these icons:
| Icon | Action | Description |
|---|---|---|
| 📅 Calendar | Session History | View all sessions this student attended |
| 📋 Tasks | Onboarding Tasks | View/manage onboarding progress |
| ❌ X | Remove | Remove student from group |
Viewing Session History
- Click the calendar icon next to a student's name
- View their complete history:
- All sessions assigned
- Attendance status for each
- Summary statistics
Quick Reference
Add Student to Group
Class Group Detail > Students section > Assign Students > Check student > Assign Selected Students
Remove Student from Group
Class Group Detail > Students section > Click X next to student > Confirm
Sync All Students to All Future Sessions
Class Group Detail > Quick Actions > Sync Student Enrollments > Confirm
Add Student to Specific Session
Sessions section > Click ➕ icon > Available Students > Add
Remove Student from Specific Session
Sessions section > Click ➕ icon > Assigned Students > Remove
Troubleshooting
| Issue | Cause | Solution |
|---|---|---|
| Student not showing in Assign modal | Student not in associated class(es) | Check if student is enrolled in BrainFit HQ class |
| Student in group but not in sessions | Not synced after adding | Use Sync Student Enrollments |
| Can't remove student | Trainer role | Only admins can modify membership |
| Sync not working | No future sessions | Generate sessions first, then sync |
| Student showing in old sessions after removal | By design | Removing from group doesn't affect existing enrollments |
Best Practices
- Add students to group first before generating sessions
- Use Sync when you want all students in all sessions
- Use manual method when students have different schedules
- Don't remove students unnecessarily - it's often better to mark as inactive
- Check session enrollments after adding new students to verify sync worked
Last Updated: December 2025